Another of my Michigan projects has come to completion. It is so satisfying to see something change before your eyes from blah and glum to something that makes you think…oh my goodness, it looks exactly how I wanted it! I had my eyes set on a desk from Pinterest. I liked the style and the color combo of dark black toned wood with brown rubbed accents for a distressed look. This is the site it was originally posted on :http://primitiveandproper.blogspot.com/2012/03/poww-80-furniture-link-party.html.
So here he is. Yes, I found him on Craigslist 🙂

i have a vision of a flat black look, distressed with gold-ish brown accents…we will see
He came with a really nice 1/4 inch thick custom cut glass top…that alone was well worth my $40 investment!
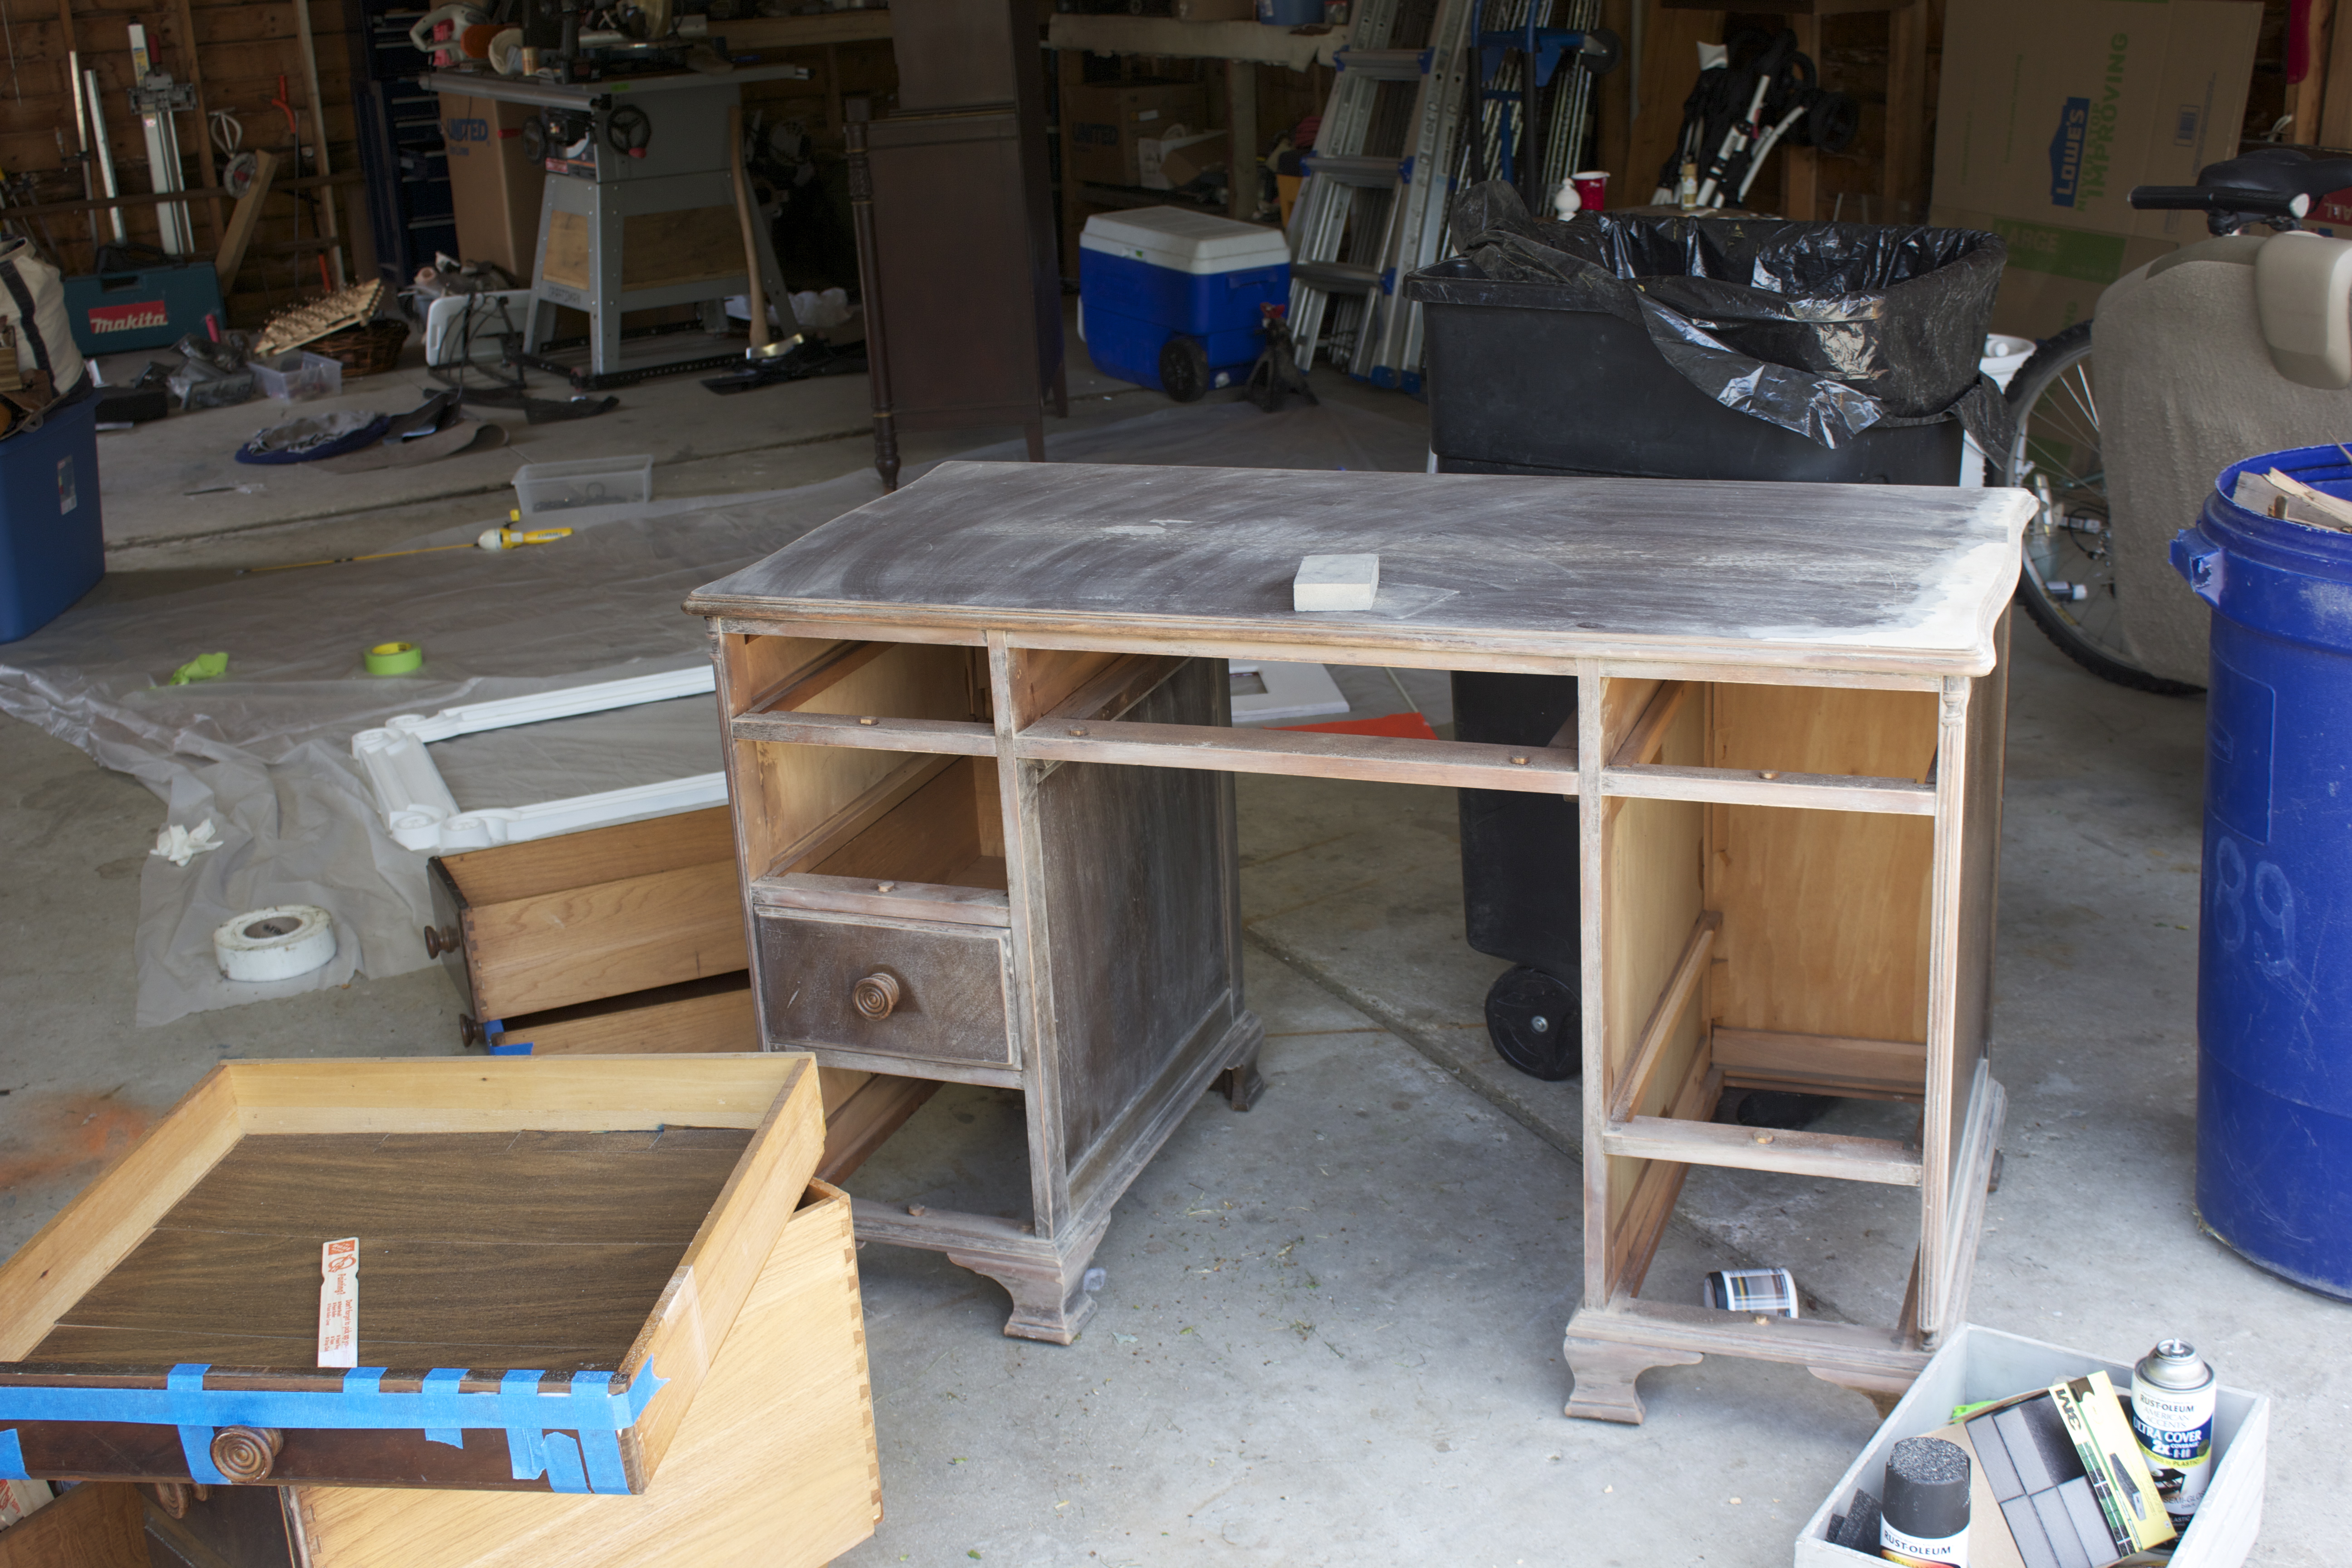
Now it is time to give him a light sanding and paint him with some black chalk paint.
Remember, no primer is necessary when using the chalk paint. I have read it is due to the Plaster of Paris that is added to the paint that creates a “porous” surface. Instead of the paint merely floating on the top of the wood surface, the plaster bonds the paint to the wood surface. Any hoo…

So, I will admit, I am bad about taking pictures of all the steps I took. Quite honestly, I am a bit ADD. I have been hopping around from one project to another, working on all of them at the same time. Heck, I am Woman! Hear me Roar! LOL. Okay, not really roar, but I do attempt to multitask when I can. It is so much easier when I get to be creative!
So I had to do a bit of everything on this old boy. The veneer on the top was lifting a bit; also on some of the drawer fronts, hence the blue tape in the picture above. I had to apply wood glue under there and “clamp” it together with my painters tape. There was also some chipping on the top where the veneer once was, but had flaked off around the edges. I used some handy, dandy wood filler….in hindsight I think this was probably a little too large of an area to try to fix with wood filler alone, but whatever. I did what I could, with what I had, within the scope of my very limited abilities.
Just so you know, I have been surrounded by very able bodied people throughout my life, that could have done a much better job on this old boy than I ever could, but they aren’t here. So there! And one more thing, just for the record, I have, on more than one occasion, asked my DH to show me how to use his power tools…he looked at me with this, “You have got to be ****ing kidding me!” He told me there is no way he is going to do that. I guess he wants me to keep all my “digits”! LOL.
Well, that is fine, for the average Joe…or JoAnne, but I don’t like being told, “NO”! I have flashbacks of High School, when I wanted to take Auto Shop as one of my electives and my counselor told me, “No”. She said I would be the only girl in there and she wouldn’t let me do it. Guess what I was allowed to take instead? You guessed it, Home Economics. Hey, I like my very Domesticated side, but I like to do things for myself as well.
So, I use my hubby’s chop saw…when my he isn’t around… and the drill, again, when my DH is no where in the near vicinity. I have also used the table saw a couple of times, but I have to admit, it is a bit intimidating for me. And that is enough for me to stay away unless I am absolutely desperate!
Now that I have ranted, back to my Beaut! I painted him with a couple coats of black chalk paint, made by yours truly. But standing back, he just didn’t seem dark enough….what did I have sitting around the garage that I could use…hmmmm.
I chose to use some finishing wax with some dark stain added to it, thinking this might just add that depth that I was looking for. I rubbed that on, but it still didn’t do much…. So I said, “The hell with it”. I ended up just grabbing the can of dark stain and slathered it all over my Beaut. I really should have done this over the tarp I bought, because by the time I got to this point, I was a bit discouraged and fed up with it not looking the way I wanted it to look. I soaked this puppy in the dark chestnut stain and let it sit for about 5 minutes. I then took a rag and ever so gently wiped it down. It was still “wet” from the stain, but I just let it dry on there. After it dried, I applied 2 coats of wax and called him done!
Next I needed to add the handles. I was really envisioning something fabulous from Hobby Lobby (love, love, love that store)! But in an effort to keep this project to a minimum dollar expenditure, I used the handles from our kitchen cabinets in North Bend, Or. Installing these handles was a pain in my butt! I now know why I usually leave this type stuff to my DH. This is not my forte. Note to self, drill those damn holes a bit bigger to start out with and things will be a heck of a lot easier. I really don’t think sweating should be an effect of attaching handles to a drawer!
And here he is. What do you think?
 It is already a hiding place for the little ‘uns!
 the glass top

 He is so handsome!
 darn it, I need a mouse pad now…my cordless mouse doesn’t agree with my glasstop! lol.


Suz, I love this. It really turned out nicely. I am so impressed that you can look at that old, worn out piece of furniture and envision what you want it to be. Love, love, love the stuff you are doing.
Thank you!!!!
Nice, did you get the cedar chest you were telling me about?
Finished her today…at least as much as she is going to be for now… will post on her soon 😉